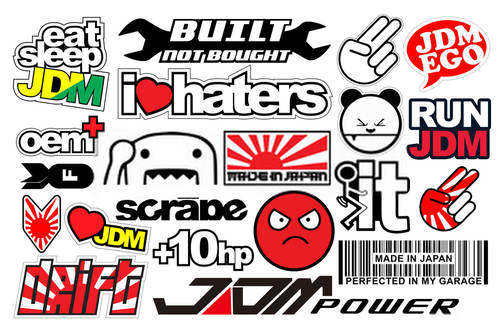
Tag: make vinyl sticker

  • How to Print Vinyl Stickers at Home- 3 Easy Steps

    How to Print Vinyl Stickers at Home- 3 Easy Steps

    Vinyl stickers are an easy way to promote your business with low investment. So the sticker should be attractive. Therefore, make your own vinyl sticker is an excellent way by applying your thinking and skills.

    If you are thinking of preparing this for the first time, then this tutorial is for you. And I am really happy to share the process about ‘how to print vinyl stickers at home?

    By applying this process, you can easily create great vinyl stickers at home.

    Prepare it using a few ingredients. Manufactured vinyl stickers are perfect for labeling and sorting in different places.

    You will need a good-quality printer to complete this process. We recommend a top online sticker manufacturer if your purchase of a printer is more than your budget or you do not have much time to make your own vinyl stickers.

    With their help, you can get highquality stickers without having to worry about the cost or time investment. Visit the CustomSticker.com website.

    Print Vinyl Stickers

    But, If you have a printer and all the tools to make vinyl stickers then you can make stickers in very little time and at a low cost.

    HOW TO PRINT VINYL STICKERS AT HOME

    Ingredients:

    1. Perfect Printer (Here you will find some Best Printer for Stickers).
    2. Clean vinyl paper.
    3. Laminating sheet.

    let’s make a vinyl sticker. I have presented step by step how to make a vinyl sticker at home for your convenience.

    STEP-1:


    SELECT PAGE SIZE:

    Print your great DIY vinyl plastic sticker vinyl at home by using printable vinyl and color inkjet printers.

    Look for the Size button in your software menu bar and set the page size to 8.5 × 11 on the Pages Settings tab. Pages of this size easily fit into a  regular desktop inkjet printer.

    Or set the size of the vinyl sheet you are using. However, it should take a size that your printer can handle.


    DRAW A PICTURE:

    The second step in making vinyl stickers is to design the sticker logo or image. If you have trouble coming up with a design, Then you can get help online.

    Choose a design depending on what type of sticker you want and where you want to use it. Online search allows you to easily understand the size of the sticker and get an idea of ​​the color. Or create a design using image editing software.

    You can choose the design in different ways. In that case, you can do it online using graphics or images.


    SET THE NUMBER OF STICKERS:

    If you want to get a bunch of stickers of the same design, then fit the copies in rows on the paper and paste them more than once. Design according to the size of your 8.5 × 11 paper so that the designs fit easily.

    Draw a rectangle around the designs. And make sure that the copies do not cut the margins. In that case, keep the copies away from the edges of the template.

    Use vibrant colors to create colorful designs. So that the sticker looks bright and beautiful after printing. In this case, printable vinyl is an easy and great way.


    SET BOUNDARIES:

    If you want to add a cut line to the edge of the sticker, click ‘Trace Outer Edge’.

    Using the offset tool you can place your desired white or colored distance borders around the stickers.


    PRINT THE STICKERS:

    When your design and directions are complete, send your printable vinyl to a printer for printing.
    When sent, click the Print button of the image editing software and press / (File> Print).

    Wait for the print to finish. When your vinyl sticker is printed, place it on a flat surface.

    [su_divider style=”dotted” size=”1″ margin=”20″]

    STEP-2:

    If you print stickers with a laser printer, it will be water-resistant. However, it will only last for 1 year.

    As a result, laminating your stickers, it will protect your stickers from UV rays, water for a long time.


    PLACE LAMINATING ON VINYL:

    Place your printed vinyl sticker on a flat surface. Place the laminate on either end of the vinyl paper. After decorating, start peeling back. And press the laminate sheet over the vinyl paper with the help of your fingers. Make sure there are no air bubbles.

    Note: You can use the edge of a ruler to avoid air bubbles. This is effective in keeping your sheet smooth and free of air bubbles.


    CONTINUE THE PROCESS:

    Pull the laminate sheet over the bottom of the vinyl paper. And continue the process until all your vinyl is finished laminating.

    Finish the process when all your backing is done. Make sure the sticker is smooth, and there are no air bubbles.

    [su_divider style=”dotted” size=”1″ margin=”20″]

    STEP-3:


    CUT THE STICKERS FROM THE VINYL LAMINATE:

    Place your printed vinyl sheet on a cutting mat. Cut the stickers from the sheet. If your printed stickers are rectangular, cut them straight. In that case, using a knife and a ruler makes the job easier.

    However, if your stickers are round, use a scissor without cutting with a knife. This way you can easily round the sticker.

    Once the cutting process is complete, separate the stickers from the discarded parts.


    USE THIS STICKER:

    Now your stickers are usable.

    To use it, pull the back of the sticker and peel off completely with the help of two fingers. And apply it to the place of your choice.

    [su_divider style=”dotted” size=”1″ margin=”20″]

    ALSO CAN FOLLOW THE VIDEO INSTRUCTIONS

    CONCLUSION

    After completing the instructions on how to print vinyl stickers at home. We believe that now you can easily make the greatest quality of vinyl stickers anytime at home.