Tag: waterproofing

  • Damp Proofing Vs Waterproofing: Advantages And Disadvantages

    Damp Proofing Vs Waterproofing: Advantages And Disadvantages

    Damp proofing and waterproofing can be perceived as somewhat similar and in a sense, they are. But the terms cannot be used interchangeably due to the significant differences between them. But what are these differences?

    Damp proofing refers to protection against moisture whereas waterproofing can prevent water penetration even when there’s hydrostatic pressure is present. The options differ in material, durability, thickness, cost, and resistance. 

    If you want details about this damp proofing vs waterproofing comparison, make sure to read the entire article. 

    DampProofing Vs Waterproofing

    Damp Proofing Vs Waterproofing: Basic Differences

    Aspect Damp Proofing Waterproofing
    Definitions Prevents dampness or moisture Strong protection from water and moisture
    Purpose Protects from soil moisture penetration Protects from water and hydrostatic pressure
    Material Tar or unmodified asphalt Bentonite, rubberized asphalt, crystallization products, etc.
    Resistance Limited resistance to hydrostatic pressure Resistant to hydrostatic pressure
    Stability Comparatively less stable More stable and durable
    Cost Generally less costly Typically more costly, but worth the result

    As mentioned above, there are several differences between damp proofing and waterproofing. Going through them in detail will help you understand each option with more clarity. Let’s check out the comparison points in detail. 

    Definitions

    As the name suggests, damp proofing prevents dampness or moisture. This is particularly suitable when you want to protect your home from the soil’s moisture. It’s a preventive layer that prevents moisture from penetrating your home. 

    Waterproofing on the other hand provides strong protection from water, not only moisture or water vapor. That means, even if there’s hydrostatic pressure present in the soil, waterproofing will protect your home from it. 

    Material

    The materials used for damp proofing and waterproofing are different too. Damp proofing is usually done using tar or unmodified asphalt. Waterproof coatings, on the other hand, can be done using bentonite, rubberized asphalt, crystallization products, Urethane, Butyl, etc. 

    Resistance 

    When comparing resistance, it refers to the resistance to hydrostatic pressure. In areas where there is hydrostatic pressure present, damp proofing will not last long. On the contrary, you can easily rely on waterproofing regardless of the pressure. 

    Stability 

    As you can already guess, waterproofing is comparatively more stable than damp proofing. So, if you are measuring durability, waterproofing will have an advantage over damp proofing. 

    Cost

    The cost depends on the service provider and the material you are choosing. However, waterproofing is usually a bit more costly than damp proofing. Nonetheless, it can be said without a doubt that the price is certainly worth the result. 

    Damp Proofing Vs Waterproofing: Advantages And Disadvantages

    Now that you know what the basic differences between these two are, let’s get to the advantages and drawbacks of waterproofing and damp proofing.

    Damp Proofing Vs Waterproofing

    Damp Proofing

    Advantages:

    Damp proofing can be beneficial for someone looking for light protection against moisture. This is a comparatively cheap option and provides a decent barrier against moisture. 

    Disadvantages:

    It can not protect your home against hydrostatic pressure. When you want hardcore protection against water, this is not the option to go for. In addition, it can’t cover cracks and is comparatively less durable. 

    Waterproofing

    Advantages:

    Waterproofing lasts longer than dampproofing. It’s stable and can provide protection against water and other liquids even in the presence of hydrostatic pressure. So, it’s suitable for all areas. 

    There are several options available when it comes to material. Besides, the installation of waterproof coating is also more convenient.  

    Disadvantages:

    Waterproofing is comparatively more expensive than dampproofing. 

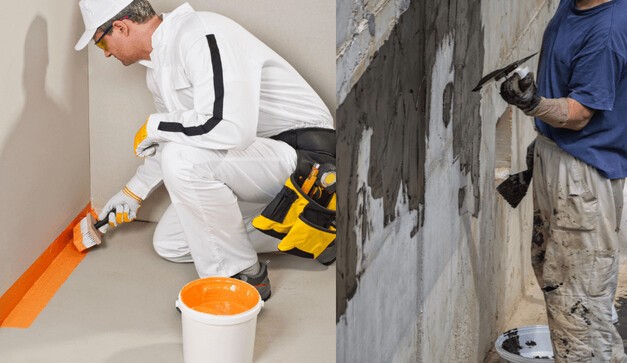
    Damp Proofing of a wall

    Damp Proofing Vs Waterproofing: Summary

    Let’s take a look at the table below to get a summary of the differences between damp proofing and waterproofing.

    Subject Of ComparisonDamp ProofingWaterproofing
    FunctionProtection against moistureProtection against water and other liquids
    MaterialUnmodified asphalt Bentonite Rubberized asphalt Crystallization products Urethane Butyl
    Cost$3 to $6 per square footLong-lasting protection Stable in fluctuating temperatures Durable Several material options cover cracks
    DurabilityComparatively less durableComparatively more durable
    Cured ThicknessLess than 10 milsMinimum 40 mils
    Crack CoverageClose to noneUp to 1/16 inches
    ResistanceDoes not resist water indefinitely when hydrostatic pressure is presentPermanently prevent water damage even when hydrostatic pressure is present
    AdvantagesLong-lasting protection Stable in fluctuating temperature Durable Several material options cover cracksLong-lasting protection Stable in fluctuating temperatures Durable Several material options cover cracks
    DisadvantagesNot durable Installation can be complicated Cannot cover cracks Brittle in low temperaturesComparatively expensive

    Damp Proofing Vs Waterproofing: Which One Is Better?

    You may have already come to a conclusion by reading this article. In almost every aspect, waterproofing is the winner over damp proofing. But still, many people choose to go for damp proofing. Why is that?

    The first reason is of course the price. Damp proofing will save you a lot of bucks. But take a moment and think about it. Are you really saving money? When you choose something as short-term as dam proofing, you raise the possibility of spending money on the same field again after a few days. This is not saving money. On the contrary, it costs you more money. 

    Waterproofing can not only save you money of redoing the whole thing but also solve most problems of your building. Cracks, moisture, and water leakage are all problems that can be sorted out only by choosing a waterproofing solution. 

    Nonetheless, it’s very important that you invest your money in the right place. There will be a lot of expensive options for damp proofing. Similarly, you may find a lot of cheap options in waterproofing. However, they will not meet your expectations. 

    So, do it right the first time. Avoid the hassles of redoing the same thing again. Take your time and choose a trustworthy service provider to do this for your house. This way you can not only prevent future expenses but also protect your home using the best way possible. 

    Final Words

    There you have it. Everything you needed to know about damp proofing vs. waterproofing. Hopefully, this article will make your decision much easier. Even if you are not using any of these options right now, it’s always better to keep your knowledge up to date. 

    Knowing your options is easy. But when it comes to implementing them, people may make mistakes. The primary reason is always the expense. But when you are thinking about the future, you are actually saving money by investing in a high-quality option. So, never make your decision solely based on the price of a product, and take your time before selecting any option. 


    References

    1. https://www.wrmeadows.com/blog/waterproofing-vs-damp-proofing/#:~:text=In%20short%3A,all%20moisture%20and%20liquids%20out
    2. https://precast.org/2014/03/damp-proofing-vs-waterproofing-part-1/ 
    3. https://www.nerolac.com/blog/what-is-damp-proofing-and-difference-from-waterproofing 

  • Make Waterproof a Canvas Tent in 5 Steps

    Make Waterproof a Canvas Tent in 5 Steps

    Tents are usually the most important element for adventure lovers to enjoy camping and various outdoors. So you need the best quality tent that will keep you safe from various harsh situations and hostile weather.

    In this case, the canvas is one of the many conventional tent elements that are very effective and best to protect you from various conditions.

    The canvas tent is a very durable and most breathable fabric so it is not likely to condense. Also, the canvas material is best for the ideal shelter on the trip because it can absorb water naturally.

    However, during long-term use, its components are reduced. as a result, rainwater enters the inside of the tent.
    So the tent needs proper maintenance to enjoy safe travel, and to keep waterproof.

    DO CANVAS TENTS NEED WATERPROOFING?

    Canvas tents are great for camping for various outdoor activities. This is because the canvas is weave in an ultralight way and water cannot penetrate inside the tent due to Its natural waterproof elements.

    So why should you waterproof your tent? If your tent gets leaked during heavy rains, water and moisture can enter your tent.

    Although the canvas is very durable for long time use, its material may be reduced. As a result, water may seep into the tent.

    Also, the canvas has some natural waterproofing but it is not completely waterproof so you need to make the tent waterproof.

    Note: Now if you want to use a solid plastic sheet to waterproof the tent it would repel water. But it is not breathable. So, there will be no ventilation on the canvas. And if it doesn’t rain, the plastic sheet covering can spread a bad smell to the fabric of the tent.

    Since it’s not a completely closed surface, water could leak through. So you should waterproof the canvas tent with a tent waterproofing spray.


    SEASONING VS WATERPROOFING

    When you bring a new canvas tent you will see about million needle holes in it and these pinholes are bigger than threads. All the seams of the canvas are sewn together, As a result, micro pinholes have been creating. And water can enter the tent through all these holes.

    So the pinholes or seams have to be sealed through the seasoning process. The tent has to be soaked and dried a few times during the seasoning process, the canvas expands as a result of wetting and the compression fills the holes. This way you can waterproof the tent by closing the micro pinholes.

    The tent should not be waterproofed with silicone waterproofing spray in new condition. After a few years of using the canvas tent, the pinholes may leak then you can waterproof the tent with a waterproofing spray.

    WATERPROOF CANVAS tent

    HOW TO WATERPROOF A CANVAS TENT

    The easiest and greatest way to make your tent waterproof is to apply a waterproofing spray. Usually, waterproof sprays do not destroy the ventilation of the fabric and seal the pores on the canvas well. So choose a waterproof spray based on silicone or fluoropolymer.

    So let’s take a step-by-step look at how to make the canvas waterproof with a waterproof spray.


    WHAT PRODUCTS DO YOU NEED?

    • Waterproofing spray
    • Paintbrush
    • Ladder
    • Sealant
    • Cleaning supplies

    Note: To make the tent waterproof, you should choose a sunny day so that the tent dries completely very well.


    STEP-1: SET UP THE CANVAS TENT AND CLEAN IT WELL

    Set up the tent in a sunny place and place the ladder in the corner of the tent. The ladder is needed to clean and spray every corner of the tent.

    Thoroughly clean all the dirt and grime in your tent with detergent and a soft sponge. You can use a stiff brush to remove any stubborn germs.

    Also clean the tent rain-fly, floor, and zippers. Wash everything. Make sure there is no dirt left in your tent.


    STEP-2: APPLY A WATERPROOFING SPRAY

    Once the canvas is well cleaned, apply a thin layer of waterproof spray to the tent. Coat the entire tent evenly. Cover the holes well, and apply a double layer with a paintbrush on a hole.

    Also, apply waterproofing spray well on rain-fly and tent floors.


    STEP-3: APPLY SEALANT ON THE SEAMS

    Tent seams should ensure the best protection. Because most of the water can enter the inside of the tent through the seams. So waterproof the seams with a silicone sealant. Apply a double layer of sealant on the seams to provide extra protection. In that case, you need to choose a flexible sealant so that it is not difficult to fold the tent.


    STEP-4: WIPE OF EXCESS

    Remove any excess of the spray on the surface of the tent with a damp cloth.


    STEP-5: DRY THE TENT AFTER THE SPRAY IS COMPLETE

    Applied spray to everything in the tent, now gives it 12 hours to dry. You can give it more time to dry well. Once dry, check if the tent is waterproof. To test, throw water into the tent with a hose. And if you don’t feel satisfied, repeat the process, and apply multiple layers of waterproof spray.


    CONCLUSION

    A waterproof tent ensures your comfortable camping, so you need to make sure your tent is waterproof. In that case, you need to take care of the tent and make it waterproof so that water does not reach inside your tent.

    Make your tent waterproof and make the trip memorable by following the simple steps to waterproof the above tent.

    HAPPY CAMPING…

  • Seasoning a Canvas Tent in 5 Easy Steps

    Seasoning a Canvas Tent in 5 Easy Steps

    The canvas tent is more acceptable to travel lovers for its waterproof ability, durability, and ventilation facilities.

    A best quality waterproof tent is great for all types of weather. And the canvas fabric material is waterproof but it is not completely waterproof. So it is necessary to seasoning the canvas so that moisture or water does not seep inside the tent on rainy days.

    But most people do not know How to seasoning a canvas tent properly. So we have come up with an accurate direction for you. So that you can waterproof your tent easily.

    So by following the directions and preparing your canvas tent to enjoy a relaxing camp.

    WHY DO YOU NEED TO SEASON YOUR CANVAS TENT

    Seasoning is an awesome process to make the canvas waterproof to withstand rainy weather.

    The manufacturer sews all the seams to connect the canvas panels. After the sewing process is completed, millions of needle holes (holes larger than threads) are left on the canvas.

    And water can enter the inside of the tent through these holes. So, these holes should be closed.

    So, What can you do to close all these pinholes?

    You’ve got countless holes in the canvas. You can reduce each of the leaks by the seasoning process or using a tent waterproofing spray.

    WHAT DOES CANVAS TENT SEASONING DO?

    Seasoning is reducing the holes by watering the canvas. After the canvas is soaked in water the threads are stretched and shrinks the elements of the canvas. as a result, the tiny holes are reduced. And of course, the tent must be dried after the soak.

    WHAT DOES CANVAS TENT WATERPROOFING SPRAY DO?

    Silicone-based waterproofing spray is great for waterproofing the tent. It seals the holes and the tent provides complete waterproof protection.

    However, silicone-based sprays on canvas in new conditions should be avoided. Because, using it the canvas does not breathe, and in a short time it becomes hot.

    waterproofing canvas tent

    HOW TO SEASONING A CANVAS TENT

    Reduce the pinhole by applying the seasoning process and prepare a tent for camping. Season your canvas tent in just 5 easy steps. So let’s take a look.

    Note: To season the canvas tent you will need a garden hose and a safe place.

    STEP-1: SELECT A LOCATION AND SET UP THE TENT

    You need to set up your tent for a few days to do the seasoning.

    Since the tent needs to be set up for 4-5 days, it needs a safe place with plenty of space so that there is no damage to the tent. In that case, it is safe in your backyard or driveway.

    Set up the tent at the selected location. Set it up exactly the way you set up the tent on the camping trip. Zip the tent windows and close the vents.


    STEP-2: WETTING THE CANVAS WITH RAIN OR HOSE

    You have no control over the weather. Your tent needs to be dried after soaking for seasoning.

    So if you want to wet the tent with rainwater, then you will want to dry it in the sun as soon as you wet the canvas.

    But, you don’t know when the rain will stop. Moreover, It may rain for 2-3 days.

    So the best way to get your tent is to use a garden hose. Spray in the tent for about 10 minutes, soak the seams well. And make sure the tent is completely wet.

    Enter the inside of the tent and identify the areas of the holes (usually you will see sunlight in the leaks). Come back outside and spray water better on the identified areas.


    STEP-3: DRY THE TENT AND REPEAT THE PROCESS

    After soaking the tent for the first time, leave it to dry for a few hours. It needs to dry well before moving on to the next step.

    You need to do this wetting and drying process 2-3 more times. After the first wetting, spray the water well on the area where you have found the leaks. And dry the tent well after each soaking.


    STEP-4: TEST FOR LEAKS

    After your seasoning activities are complete it can be expected that the canvas has expanded naturally to fill the holes.

    However, to ensure this, the pinholes need to be checked. So spray water with socks and see if water enters the inside of the tent, pay more attention to the seams. Also, look for light pinholes.

    If you find any spot after checking, you can repeat the seasoning process before it will be fully water-resistant.

    after following the complete steps above, then If you find the leaks, it’s time to use a waterproof spray to seal the leaks at this point. You can seal the tent with a waterproofing spray.


    STEP-5: PACK AND STORE THE CANVAS TENT

    Your tent is now completely waterproof and suitable for traveling. And the tent is able to keep you safe in any situation.

    If the canvas dries well, pack it. And leave in storage.

    CONCLUSION

    The canvas tent is a reliable shelter material for enjoying the camp. The seasoning process makes your canvas tent suitable for use in all situations.

    Following our directions completely, and do seasoning every 12 months to make your canvas tent longer.

    And enjoy dry camping in Heavy rain without any rainwater.