How To Remove Waterproof Band Aid Painlessly- 6 Methods
Think about it, has it ever happened, you didn’t use bandages on your wounds for fear because of getting hurt in removing the bandages? Your answer will be “Yes” or “No”.
If you are aware of your own health you will never do it. But to avoid this slight pain we should not avoid using a bandage on the wound.
Because you know the necessity of best waterproof bandages for swimmers. It prevents dirt from entering the wound site and helps reduce pathogen contamination and also prevents painful impulses.
Yes, it’s true that most of the time we have to suffer from pain when removing a waterproof bandage. The pain becomes more serious if you don’t know how to remove the waterproof band-aid painlessly.
For which, we’ve got a few clever hacks for you to remove waterproof band-aid painlessly. Read on it and discover which method works best for you.
How to Remove Waterproof Band-Aid Painlessly
- Using soaps or oils
- Using alcohol
- Freezing the adhesive
- Ripping it off quickly
- Pilling it off slowly
- Melting the Adhesive
What to Do Before Applying the Method
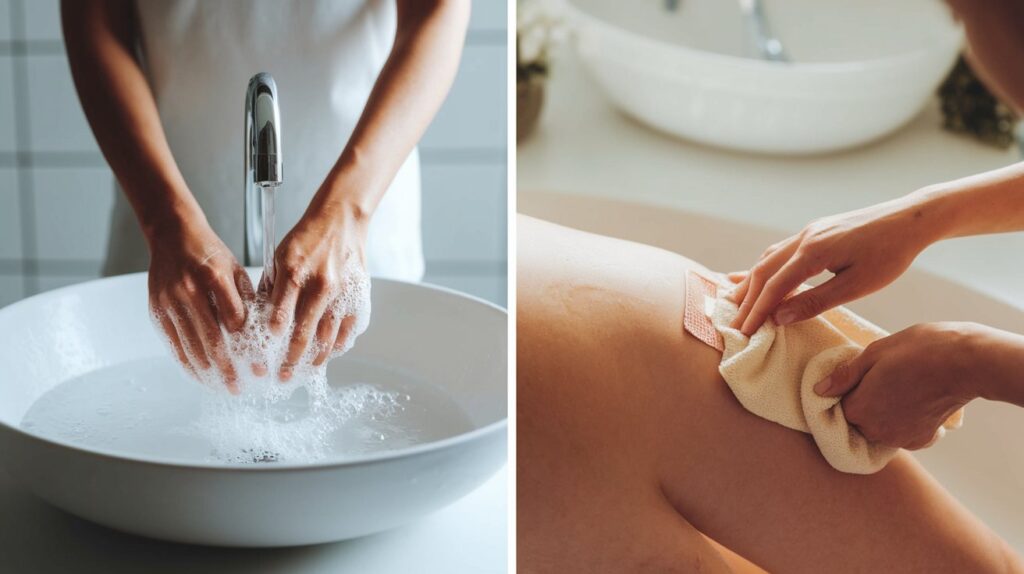
Wash Your Hands
Before taking each step, you must wash your hands with soap and clean water. Gently rub the back of your hand, underneath your fingernail with the soap.
Continue scrubbing for at least 20 seconds. Make sure there are no germs. Then wash your hands thoroughly in clean water.
As an alternative to washing your hands, you can use a sanitizer with 60% alcohol.
Clean the Area Around the Band-Aid
Clean the area around the bandage as you wash your hands. If there is any type of germs, it can attack your injured area while removing the bandage.
Then wash the area around the bandage with clean water and soap. And wipe well with a washcloth.
Now you are completely safe from bacteria and ready to resort to any method to remove the bandage.
Process-1: Use Soaps Or Oils
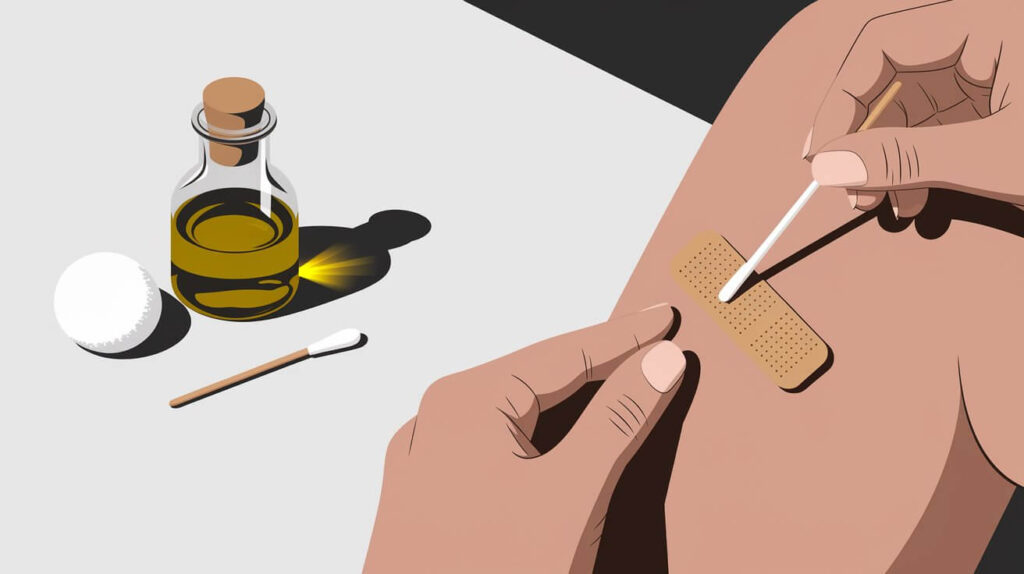
1. Choose a Lubricant
You can use olive oil, baby shampoo, petroleum jelly, or baby oil for waterproof band-aid removal. All these options work equally well.
2. Apply with a Cotton Swab
Use a cotton swab to massage the area. Then, soak a cotton ball with your chosen lubricant.
3. Loosen the Adhesive
Gently rub the cotton ball over the sticky part of the bandage. This will help make the adhesive slippery.
4. Test the Adhesion
Scrape a corner of the band-aid to see if the adhesive has weakened. If it lifts easily, the process has worked.
5. Consider the Duration
The time required depends on the band-aid’s size, location, and adhesive strength.
6. Repeat if Necessary
If the bandage is still stuck, apply more lubricant and repeat the process.
7. Remove the Bandage Gently
Once loosened, slowly peel off the band-aid. This should require little effort and cause no pain.
Process-2: Using Alcohol

Taking off a waterproof band-aid can be tough, especially if it’s stuck to hair or sensitive skin. Using rubbing alcohol helps loosen the adhesive, making removal much easier and less painful.
What You’ll Need
- Rubbing alcohol (70% or 91%)
- Cotton ball or swab
- Tissue or paper towel (optional)
Step 1: Apply the Alcohol
Soak a cotton ball with rubbing alcohol and gently dab it around the edges of the band-aid. If it’s a larger bandage, you can pour a little alcohol directly onto it.
Step 2: Give It Time to Work
Let the alcohol sit for a few seconds. It will start breaking down the adhesive, and you may see the edges of the band-aid lifting on their own.
Step 3: Test the Adhesion
Gently peel up one corner of the band-aid. If it comes off easily, you’re good to go. If it’s still stuck, apply a bit more alcohol and wait a little longer.
Step 4: Remove the Band-Aid
Once the adhesive has loosened, slowly pull off the band-aid. It should come off smoothly without pulling on your skin or hair.
Step 5: Clean the Skin
Use a tissue or rinse the area with water to remove any leftover alcohol or sticky residue.
Tip: If you have an open wound, alcohol might sting. To avoid discomfort, apply a little petroleum jelly or antiseptic ointment before using alcohol.
Process -3: Freezing the Adhesive
1. Gather Your Tools
In this method, you will need some ice cubes and paper towels or a thin clean cloth.
2. Make an Ice Pack
Wrap ice cubes in a thin cloth. Avoid using a gel pack, as it won’t get the adhesive cold enough.
3. Apply the Ice Pack
Hold the ice pack against the adhesive bandage for a while. The ice makes the adhesive brittle, helping it pull off your skin easily.
4. Test the Adhesion
Peel a corner of the waterproof band-aid to check if the adhesive has weakened. If not, continue applying the ice pack.
5. Consider the Duration
The time required depends on the size and strength of the adhesive on the band-aid.
6. Remove the Bandage
If the bandage lifts easily, your process is complete, and you can comfortably remove it.

Process 4: Ripping It Off Quickly
1.Prepare Yourself
It can be said that it is a psychological process. Peel a corner of the waterproof band-aid which will help you prepare and control yourself.
2. Breathe and Relax
Then close your eyes, and take a deep breath. Pay full attention to your breathing and count to three. This will signal the release of pressure from your body and help you get ready to remove the bandage.
3. Exhale and Pull
Exhale at the end of counting up to three and pull the band-aid as soon as possible. This work needs to be done fast at lightning speed.
4. Speed Matters
The faster you pull the bandage, the faster you will get rid of the discomfort.
5. Soothe Your Skin
If it irritates your skin after the process is complete, apply a piece of ice compress to the area for some relief.
Process 5: Peeling It Off Slowly
1. Be Patient
This process requires extra patience. The time it takes depends on the size of the band-aid, the amount of hair on the skin, and the adhesive strength.
2. Start at a Corner
Pick a corner and work slowly. Avoid pulling too much at once. The slower you go, the less discomfort you’ll feel. If the bandage is on a hairy area, peeling gradually will make it more comfortable.
3. Take Breaks
After lifting the band-aid slightly, pause for a few seconds. This gives your skin time to adjust, reducing pain. Continue this step until the band-aid is fully removed.
4. Stay Calm and Relaxed
Breathe, be patient, and stay relaxed while working the band-aid off.
Process 6: Melting the Adhesive
1. Use Warm Air
This method involves softening the adhesive with warm air. You’ll need a blow dryer.
2. Adjust the Heat
Set the blow dryer to its lowest heat setting. Blow warm air in a back-and-forth motion over the band-aid. The warmth softens the adhesive, making removal easier.
3. Consider the Location
The time needed depends on the bandage’s size, location, and adhesive strength. However, this method is quicker for hairy areas.
4. Test Readiness
Check if the bandage is loose enough to peel off. If it’s still stuck, apply more warm air. This method is gentle on the skin and makes removal more comfortable.
5. Repeat if Needed
Continue the process with patience until the band-aid lifts off easily.
How to Remove Band-Aids from Hairy Skin?
If the band-aid is stuck to hairy skin then it can be difficult to remove. However, by following some techniques you can remove the band-aid very easily and painlessly.
First, wet the area around the band-aid with warm water. This will help to loosen the adhesive.
Next, use a pair of tweezers to grab the edge of the band-aid and slowly peel it off.
If the band-aid is still stuck, you may need to apply a small amount of petroleum jelly or vegetable oil to help loosen it.