Moisture destroys both the durability and beauty of the wall. It will be frustrating for you when you see the wall of your house getting destroyed day by day due to moisture Prevention is wiser than cure.
Therefore, to protect your wall from outside dirt, moisture, and rainwater, taking preventive measures is the best solution. And luckily, you can protect your exterior wall from water and moisture by waterproofing it.
Now the question is, how do you waterproof the exterior wall? You can easily do this by following just a few steps. So without further delay check out the complete process. Here is our another guide about How To Waterproof A Basement Properly.
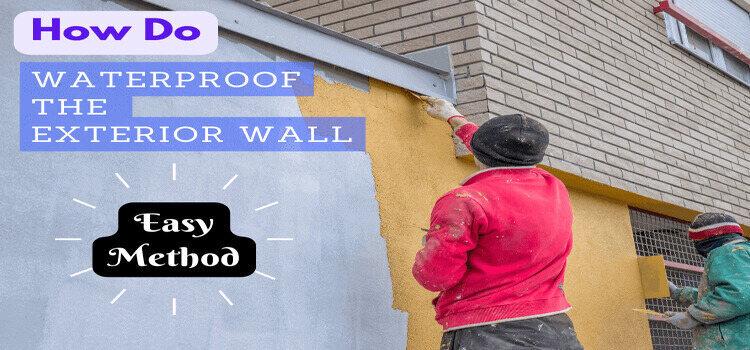
How To Waterproof Exterior Wall
In this article, we have arranged the process of how to waterproof your exterior wall in 10 steps. By following these steps, you will be able to ensure the protection of the wall very easily.
Step-1: Identify Exterior Wall Defects Thoroughly
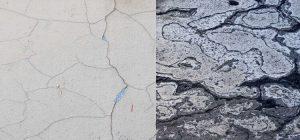
The easiest solution to protect external walls from getting damp is to waterproof the walls. Mainly due to humidity, rainwater, and other structural reasons the external wall can become damp.
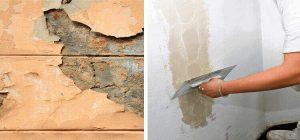
Identify wall defects such as cracks in bricks or burst water pipes. Take preventive measures if there is a problem. Generally, the wall may have a layer of dirt, so clean all the dirt and dust on the wall thoroughly. Ensure easy access to every edge of the wall.
Step- 2: Identify and Repair Wall Cracks
Before doing the waterproofing process, you need to prepare your wall. Generally, the cracks in the wall should be identified and filled.
Use hydraulic cement to fill the holes in the wall.
Our Recommendation:
DRYLOK 00917 Cement Hydraulic


Clean all the loose cement, and rough and uneven areas on the wall with sandpaper. And apply the hydraulic cement mixture into the cracks in the wall. and dry the wall thoroughly.
Step-3: Clean the Wall Nicely
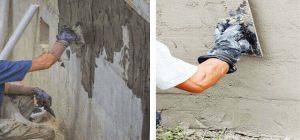
The outer wall of the house is constantly exposed to various dirt, dust, and moisture and becomes dirty, so the wall must be completely cleaned before waterproofing.
You can take sandpaper to clean the stubborn dirt. Scrub the wall thoroughly with sandpaper and remove the dust with a broom or brush. Then clean with a power washer. Make sure there is no dirt left on the wall.
Step-4: Clean the Gutters
Water flows through your gutters, but if water accumulates in drains, the wood in your house can rot. Because Wood absorbs water easily. To avoid this damage, keep drains clean so that rainwater does not retain.
Step-5: Choose a Good Waterproofing
A good quality waterproofing product should be selected to protect the exterior wall from water and moisture. Choose the right waterproofing product depending on your wall type.
If you want to get some waterproofing like cement then get concrete waterproofing coating. This formula is suitable for any type of wall and provides a long-lasting solution.
There are also silicate-based concrete sealers, but these are suitable for unsealed walls. It is capable of producing better results than acrylic wall paint and provides a beautiful waterproof coating on the wall.
That is, you can choose from concrete waterproofing coatings, waterproofing paints, and silicate-based concrete sealers according to your needs.
Here is Our Recommendation:
Liquid Rubber Concrete Foundation and Basement Sealant

![]()
Best concrete waterproofing coatings
Ames BMX5RG Blue MAX Waterproofer

![]() Best waterproofing paints
Best waterproofing paints
Armor AR350 Solvent Based Acrylic Wet Look Concrete Sealer

![]()
Best concrete sealers
However, one more thing to consider before choosing to waterproof is that the waterproofing you choose should help the walls breathe and retain moisture.
Step-6: Plaster Can Add Waterproofing Additives
A good solution is to choose a plaster waterproofing additive to add more strength to your waterproof wall. Plastering makes the wall more rigid and prevents moisture from entering. So you can protect the wall by adding a waterproofing compound to the plaster.
Step-7: Apply the Water-Proofer
Make sure the wall is fully prepared for applying the water-proofing formula. Take a brush or roller to do this process. This time, use the brush to thoroughly coat the waterproof formula. Apply in such a way that every part is evenly coated.
This time let the first coat dry well. For best results we recommend you to apply 2-3 coats. So after one coat dries well apply the next coat.
Step-8: Apply Tar and Heavy-Duty Membrane
So far your waterproofing job is complete, and now your wall is moisture and water resistant. However, more strength should be provided in the wall lowers. In that case, we recommend you use a tar-based pitch.
You can apply a heavy-duty plastic membrane to the wall to ensure extra protection. This membrane will protect your wall.
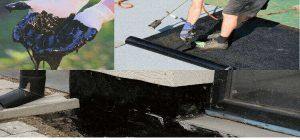
Step-9: Can Add a Grave
You need a foundation to place your drainage pipes, which can provide adequate protection to the pipes. In this case, you can add gravel.
Make a 2-3 inch flat gravel cover for the pipe. This provides long-lasting protection to the drainage pipe and covers the drainage holes.
Step-10: Test the Water Resistance
The waterproofing formula should be evaluated to see if it is able to protect your walls from water and moisture. In that case, after applying waterproofing to your wall, spray water on the wall when it dries.
Then, check if the wall is free of moisture, if the wall is free of moisture after spraying, then your chosen waterproofer is correct and effective.
Waterproofing the wall.
The most important and main ingredient in this process is waterproofing. So, make sure to choose a good quality waterproof product when waterproofing the wall.
Waterproof your wall by following the above process completely.