
While it is overlooked by many, printing white ink on labels is one of the finest ways to grab attention and make labels look aesthetic. However, it is not always that easy.
On top of that, if you are thinking of printing it on clear labels, you need to do everything by the book to make it flawless. But to do that, you should know how to print white ink on clear labels.
Choose a laser printer and replace the black toner with the white one. Then select your design and label and make a layer of the entire thing. Select a swatch color and name and then choose a color type. Combine and mix your color to make it eligible for printing.
Printing white ink on clear labels is an extended process because it requires more precision. That is why I suggest you read the full article to learn all the necessary tips and tricks.
How To Print White Ink On Clear Labels: Step-By-Step
Working with white ink and clear labels is not the same as working with other types of colors and labels. There are certain limitations to it and that’s why you need to follow multiple steps to get it done.
| Serial | Steps | Description |
|---|---|---|
| 1 | Design Creation | Create or choose the design you want to print. |
| 2 | Printer Setup | Select a high-quality laser printer and replace toner with white toner. |
| 3 | Label Selection | Choose a clear label on which you will print the design. |
| 4 | Layer Creation | Copy your design, create a new layer, and rename it for convenience. |
| 5 | Swatch Setup | In the swatch panel, select a different color, rename it, and choose “Spot Color.” |
| 6 | Color Combination | Combine the two named colors in the “Spot Color” option. |
| 7 | Color Mixing | Select a color that won’t mix with your design (avoid white). |
| 8 | Finalization | Add the mixed-color design to your library, choose “Overprint Fill,” and ensure the white ink looks vibrant on the clear label. |
So here is a complete step-by-step guide for you to learn how you can print white ink on clear labels.
Step 1: Create/Choose Your Design
The first step in printing with white ink is to create your design first. Even though printing with white ink is often limited to logos, names, and certain designs, don’t let it stop you from exploring further. If you already have a design in your mind, you can create it yourself or just choose something done by someone professional.
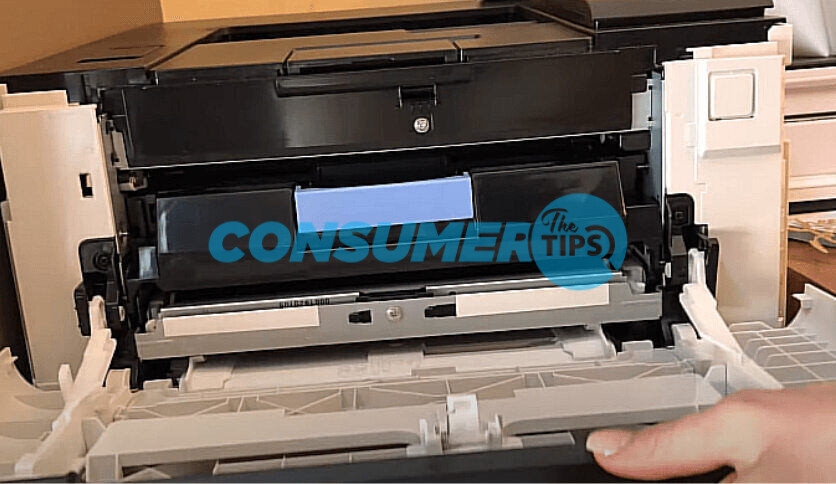
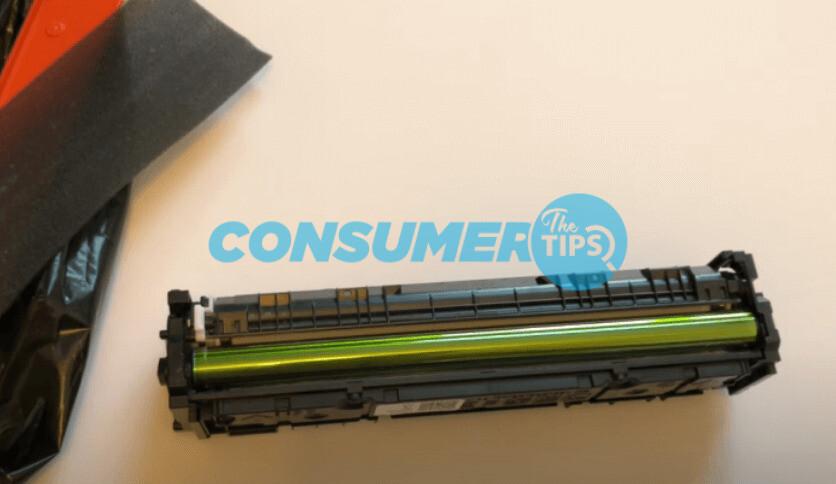
Step 2: Select Printer And Toner
Printing white ink gives you the best outcome if you use a laser printer. But make sure you have a high-quality laser printer to ensure the printing turns out perfect. If you have ensured that, remove the old black toner and replace it with white toner.
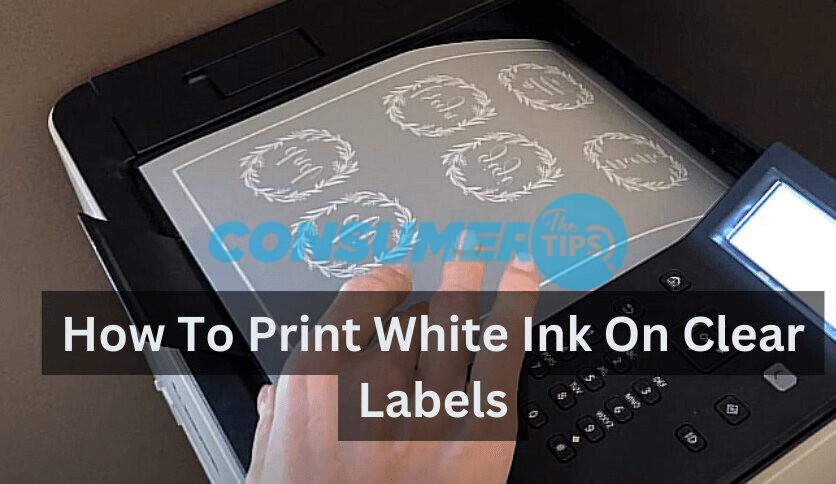
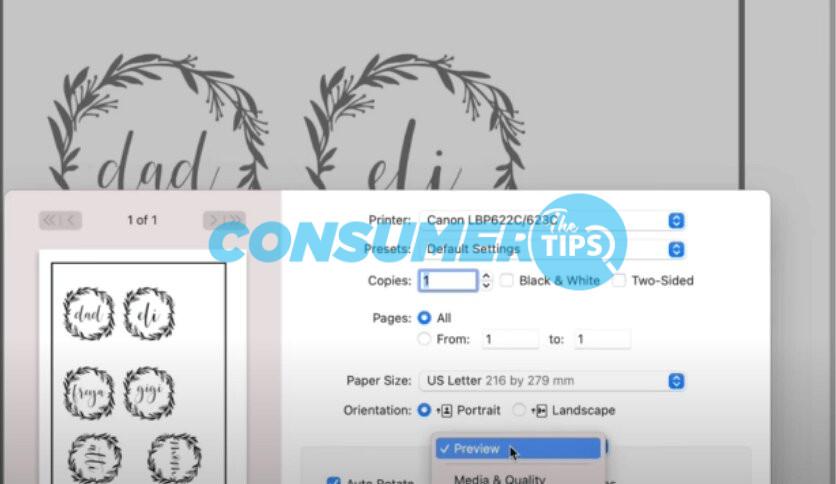
Step 3: Select The Design And Clear Label
With the printer ready with toner, select the design you prepared next. Then choose the clear label on which you will be printing the design with white ink and open the document to place the label there.
Step 4: Layer Your Design
Now that everything is pretty much ready, select the whole design and copy it. And then create a layer for the copied design. To make the printing task more convenient, you can try renaming the layer.
To do that, go to the Layer option, select Artwork, and then select the layer you want to name. You can choose any name that can help you find the design easily at any time you need.
Step 5: Select Swatch Name And Color Type
And now it’s time to work with the swatch panel where you have to select another color. Once you have selected your second color, rename it with something convenient. Then go to Color Type after selecting the swatch name. There, you will see various options for “Spot Color”.
Step 6: Combine The Layer And Color
In the Spot Color option, you will have to combine the two colors you selected and named. First, select the one you chose at first, and then select the one you chose in step 5. Then engage them with Spot Color.
Step 7: Mix Colors (Excluding White)
Combining was just one part of the process and now you have to mix the selected colors. Here, choose a color that won’t mix with the color of your existing design. My advice would be to not select white when the color mode or CMYK is visible because it will make everything difficult to view.
Step 8: Finalize Everything
Once you do that, you will get the option “Add to my library”. Select OK when it appears. Then you will have to select the Overprint Fill option in Attributes.
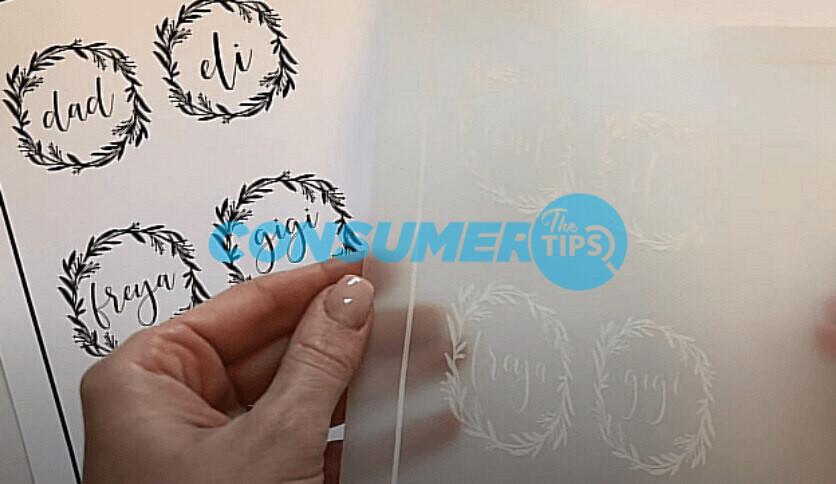
After that, you will see a “Separation Previews” option and below it, you will see only the spot colors. When it does, select your mixed-color design and your design is ready to print out. And when it does, you will see that the white ink is looking vibrant on the clean label.
Best Printing Processes To Print White Ink On Clear Labels
If you are looking for various effective options for printing white ink on clear labels, here are some for you.
| Printing Process | Method | Pros | Cons |
| Screen Printing | Ink is applied through a screen and is usually designed for white ink printing. | 1. Vibrant print 2. Thicker ink deposit 3. A more classy outlook 4. Does not get scratched away easily | 1. A more expensive process 2. Requires one to go through many processes to get the job done |
| White Inkjet/Laser Printing | Printed directly on a transfer sheet and then designed is transferred onto materials using heat. | 1. Quick printing procedure 2. Cost-effective for larger productions 3. Required products are mostly readily-available | 1. Requires drying and curing 2. Can be time-consuming at times 3. Not very durable |
| Backing Printing | The design is printed over the white backing instead of the clear label, creating an illusion. | 1. Offers a more precise white ink printing 2. White backing works as a more protective layer | 1. Can be more expensive 2. Comes with the risk of misalignment |
| Reverse Printing | Printed as a reversed image on the adhesive part of the label and applied on surfaces like stickers. | 1. Ensures a vibrant result 2. Offers a more professional outlook 3. Ensures protection against scratches and wears 4. The design remains eligible | 1. May fail to transfer all the details of the design when transferred on a surface |
| UV/Offset Printing | UV light is used to cure the design on clear labels. | 1. Ensures sharper looking printed design 2. Offers a more clear and vibrant result 3. Helps dry or cure the design rapidly 4. Very low chance of smearing or smudging | 1. Requires precise skill for working with this procedure 2. Expensive and often time-consuming |
Frequently Asked Questions
Q. How does white ink printing work?
Since the white ink is opaque, it does not let light pass through. As a result, the white ink can be printed on any surface through layering.
Q. What kind of printer should I use for printing white ink?
You can print white ink using laser printers. And while you can certainly print white ink using a traditional CMYK printer, it is best to use printers that are manufactured specifically for white ink.
Q. Does printed white ink on clear labels fade?
If you use a high-quality printer and follow the printing procedure properly, it is highly unlikely that the ink will fade easily. But printing with a low-quality printer will not give you a long-lasting result and the ink can fade easily.
Final Words
Getting creative with product labels becomes fruitful when you know how to make them eye-catching. It also comes in handy if you are after effective promotion and marketing, and many DIY crafters choose this method. That is why it is essential to know how to print white ink on clear labels. And now that you have learned everything about it, feel free to explore more to create more amazing labels.
References
https://busyofficehelper.com/how-to-print-white-ink-on-clear-labels/
https://www.avery.com/blog/how-white-ink-underprint-makes-labels-pop/
https://customany.com/how-to-print-white-ink-on-clear-labels/#How_to_Print_White_Ink_on_Clear_Labels