
![You are currently viewing How To Seal Painted Rocks [4 Exclusive Methods Included]](https://theconsumertips.com/wp-content/uploads/2022/08/How-to-Seal-Painted-Rocks.jpg)
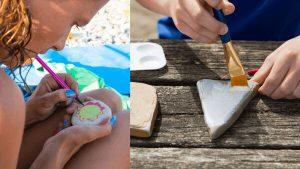
Painting rocks demands a lot of hard work and creativity. So, it is necessary to protect them from rain and sun. Several methods can be used to seal painted rocks.
If you don’t know how to seal painted rocks, in this guide, I will show you several ways to do that. So, without delaying anymore, let’s begin.
Is It Necessary to Seal Painted Rocks
Yes, you must seal painted rocks. You should seal the rocks so that they can last longer as the rocks will be protected from rain and sun when sealed. Sometimes, we want to do decoration the outdoors by using painted rocks.
In that case, you must seal them properly so that they can handle outdoor exposure.
Whether you talk about moisture, scratches, or yellowing, sealed painted rocks will be protected from everything. Furthermore, painted rocks will look more beautiful and natural. That’s why it is necessary to seal painted rocks.
That said, if you are painting rocks for any temporary purpose, you may not need to seal them. But, when it comes to using painted rocks outdoor for a long period, you should seal them properly.
How to Seal Painted Rocks?
If you want to seal the painted rocks, there are a couple of ways. All of the methods come with their pros and cons. But, at the end of the day, your beautiful painted rocks will be sealed properly. Some of the methods you can follow are mentioned below-
- Using a spray sealer
- Using a brush-on sealer
- Using a resin sealer
- Using Mod Podge
Whatever method you choose, always keep in mind that always go for the best sealer for painted rocks to get the best level of user experience.
Method-1: Sealing Painted Rocks Using a Spray Sealer
You can easily seal your painted rocks by using a spray sealer. But, you need to follow some basic steps properly to get the job done. To help you out below I will discuss those steps.

Step-1: Dry out the Painted Rocks
First of all, you need to make sure that the painted rocks are dried out completely. You can leave it for several days. If you don’t have enough time, at least dry them up overnight. If the rocks are not dry, the sealer will not work properly.
Step-2: Set Your Rocks Correctly
Choose a strong surface from this sealing process. You should spread all the rocks on that surface. There should be enough space so that you can apply spray from different angles.
Step-3: Start with a Light Coat
At this point, you need to apply a very light coat to the painted surface of the rock. Make sure that you are applying a spray from a distance of at least 8-inch. Starting with a light thin coat is a good practice. Then allow some time to dry up the coat.
Step-4: Spray the Second Coat
When the first coat is properly dried up, it is high time to apply a second coat. This coat should be heavier and you must do it from different angles so that the sides of the rocks are covered. However, you should be careful while spraying. Otherwise, you might oversaturate the rocks which will harm your paint.
Step-5: Dry Them Up
Allow some time to dry up the rocks. You should test them by touching them to check whether they are properly dried or not. Now, if you wish, you can add a third coat. But, if you are satisfied, set them aside so that they can dry up properly.
*Tips: The back side of the rocks should be sealed as well. Don’t forget to do that. The surface should be a non-stick type. Otherwise, you might mess up with the front side of the rock while sealing the back side.
Method-2: Sealing Painted Rocks Using a Brush on Sealer
In this method, you need to use a good quality water-based brush on the sealer to complete the process. Before starting to seal the painted side of the rock, you must seal the back side and dry it up.
If you have done this already, now you have to follow these steps correctly to seal the painted side of the rocks.
Step-1: Dry the Rocks
As usual, you should start the entire process by drying up the painted rocks. If you leave them overnight, I think they will be ready for the next step.
Step-2: Apply the First Coat
Now, you need to apply the first coat to a painted rock. Make sure to do the coating in a dabbing motion. You have to be so much careful at this point. You should not dab the same area twice. If you do so, chances are you will end up smearing the paint. Then allow some time to dry up the rock.
Step-3: Apply the Second Coat
After the first coat is properly dried up, you should apply a second coat. Again you need to do it in the dabbing motion. After applying the coat, you need to leave the rock aside for drying up.
*Note: If you are not satisfied yet, you can go for a third coat.
Method 3- Sealing Painted Rocks by Using a Resin Sealer
You can also use a resin sealer to seal your beautiful painted rocks. Below I will discuss the step-by-step process to seal painted rocks by using resin.

Step-1: Prepare the Mix
Put on a pair of hand gloves. Now into a container pour an equal amount of resin and hardener. If you want to avoid any mess, make sure that the ratio is equal. You can take a tablespoon from each of the chemicals to get the job done.
Now using a popsicle stick, you need to mix them. After mixing some time, you should be able to see bubbles. Stop your mixing process if you see the bubbles for around 3-4 minutes. Now, let them dry for at least 10 minutes. As a result, the resin will sit up properly.
Step-2: Prepare the Rocks
Now, you need to prepare the rocks on a plastic surface. To work with resin, a plastic surface can be quite helpful as it will not harm the rocks. However, before doing so, you need to confirm that the rocks are properly dried up.
Step-3: Apply the resin Mixer to the Rock
Now that the resin mixture is ready to use, you should soap up the rock gently by using your fingers. Of course, there should be gloves in your hand. Coat the entire rock with a thin layer for better performance.
Step-4: Pop any Air Bubbles
At this point, you need to pop any air bubbles if formed. To do that, you can use a torch or straw. You can even use a flashlight to complete the step. By any means, you need to pop the bubbles.
Step-5: Dry Them Up
Now, you should check the rock properly. If you notice any dust or other thing, you should remove it and coat it again by using the resin soap.
After applying the coat, you need to set them aside in a plastic container so that it can dry. After 10-12 hours, your rocks will be ready to use.
Alternatively, you can use UV resin to seal your painted rocks. This process will give you a better user experience. In this case, you have to follow these simple steps
First of all, you need to get a UV resin kit. There are several products available in the market. But, here you find a review of the best resins for rocks. If you do not have enough time to read this so you can pick this resin without any hesitation UV resin kit from Mr. Resin.

![]()
It comes with pretty much everything you will need during the application process.
Now, squeeze the bottle for applying the resin onto your rocks. Put on gloves on your hand and spread the resin thoroughly all over the painted rocks. By now, you should be able to notice bubbles there. Pop the bubbles by using a straw.
Finally, you need to set the rocks under UV light for 60 seconds. You should continue the UV exposure until the resin is fully cured.
Method 4- Sealing Painted Rocks by Using a Mod Podge
Another method you can follow is using the Mod podge. It comes with properties for both the glue and sealer. The application process is quite straightforward.
- First of all, make sure that the painted rocks are properly dried up.
- Now, take a small paint-brush and dip it into the Mod Podge.
- Then, apply it thoroughly to the surface of the painted rocks. Make sure that the coat is applied all over the rocks.
- After that, set them aside and let the rocks dry properly. That’s it.
What Is the Best Method for Sealing Painted Rocks
Now that you know about different methods for sealing painted rocks, you might get confused about which one you should choose. You can go for a spray sealer or brush-on sealer. But when it comes to choosing the best one, it always depends on your situation.
For instance, if you don’t have enough time and want to complete the task faster, a spray sealer can save your day. Besides, it will help you to seal painted rocks in batches. On the other hand, if you are passionate about perfection, you can go for a resin sealer.
Of course, you can prepare the resin mixture which is time-consuming. But, by following the UV-resin method, you can avoid the hassle of preparing resin. Alternatively, you can use the Mod Podge method, but it will give you a temporary solution only.
Wrapping Up!
Painted rocks are beautiful and we use them for decorative purposes mainly outdoor. So, they can be damaged easily by exposure to external weather conditions. That’s why you should seal them properly so that they can last long.
In this article, I have discussed how to seal painted rocks. If you follow the steps properly, you can complete the task very conveniently.
![Read more about the article How To Make Waterproof Stickers [All Methods Included]](https://theconsumertips.com/wp-content/uploads/2022/09/How-To-Make-Waterproof-Stickers-300x140.jpg)